Cracked and Stained Terrazzo Floor Fully Restored in Pontarddulais
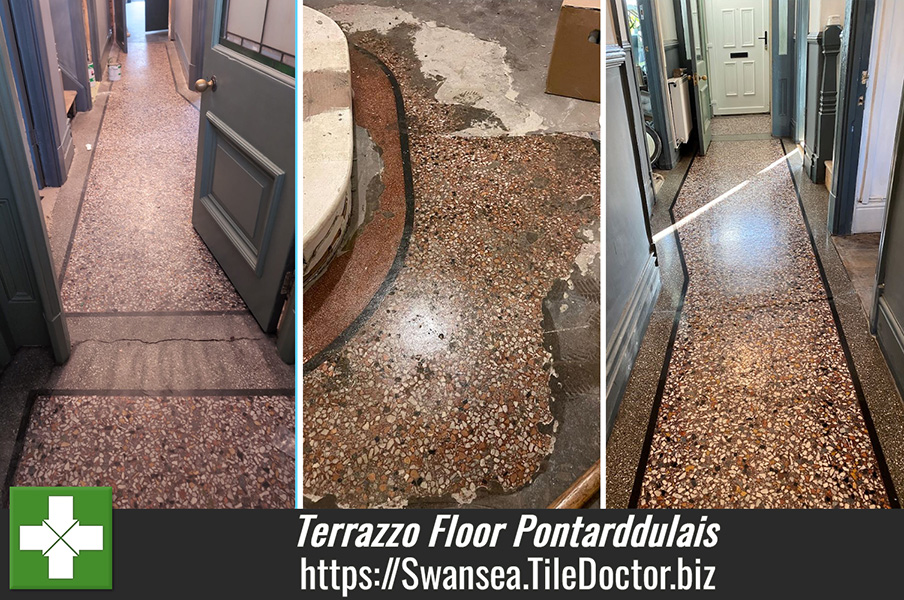
The photographs below are of Terrazzo floor at a property in Pontarddulais, just outside Swansea. They had discovered the floor while preparing the property for sale, and instead of just covering the Terrazzo back up with a new carpet they decided to restore it to give add some wow factor as you opened the door.

I went over to survey the floor and create a quote for its restoration. The floor was in a bad state with ingrained dirt and cracks. There was a lot of damage from nails being hammered into secure the old carpet as well as multiple large cracks, missing stones, and areas that had risen. There were also areas that had been previously repaired with concrete and multiple stains to deal with.
 |
 |
I made multiple notes and later that day I sent over a detailed quotation that included all the products needed to complete the project. It wasn’t long before the reply came back confirming they would like to go ahead.

Restoring a Terrazzo Floor in Pontarddulais
Being careful to work around their children and pets, work started with hand tools to grind off the concrete and work around all the edges and corners. There was a lot of damage, areas had to be filled, parts of the doorways were also repaired and there was a very large crack that had created a high raised section. This was ground down as much as possible and then using resin and tints was carefully filled many times to give the impression of marble pieces to fill the large gap.
The repair work took several days to complete using resin, tints and various stones to rebuild the damage to match the existing area.
This was followed with more grinding and cleaning with Tile Doctor Pro-Clean and Remove & Go. These products are scrubbed into the floor to loosen deeply ingrained dirt, bringing it to the surface where it can be extracted with a wet vacuum
The next step was to mechanically polish and hone the Terrazzo using a series of Tile Doctor Burnishing pads from a coarse 400-grit though to a very fine 3500-grit. The pads are applied with water to capture the soiling generated and then the floor is rinsed and extracted after each pad. This process adds a deep shine and brilliance to the stone leaving a consistent polished sheen finish that blended the floor together reduced the visibility of the repairs.
Sealing a Terrazzo Tiled Hallway
After allowing it to dry properly, the floor was sealed with multiple coats of Tile Doctor Colour Grow sealer. This is a colour enhancing impregnating sealer that soaks into the Terrazzo, occupying the pores and preventing dirt from residing there. This protection will ensure dirt remains on the surface where it can be easily cleaned away.

The floor was completely transformed by the work and the family were extremely happy with the beautifully repaired and restored floor. It had been given a completely new lease of life and added value to their house.
 |
 |
For the aftercare of polished stone flooring, I recommended Tile Doctor Stone Soap which is a gentle yet effective neutral pH tile cleaner that contains a patina enhancer.
Professional Restoration of a Terrazzo Tiled Hallway in South Wales
Cracked and Stained Terrazzo Floor Fully Restored in Pontarddulais Read More »