Grout Cleaning

Welcome to my Work History archive where you will find detailed examples of the cleaning and renovation of Grout carried out in Swansea

Cleaning and Renovating Grout

The top layer of grout is porous and can absorb grease, dirt and limescale. Spillages such as wine, lemonades or greasy substances will cause marks and patches in the joints in the floor. Grout between wall-tiles particularly in damp areas like bathrooms will become dirty and unattractive as a result of Mould, Mildew and Limescale.

Mould is one of the most unsightly problems, which usually starts off in the wettest area of the room, this could be the bottom of the shower or bath, then starts to spread and if left unchecked could cover a large area of the wall.

Another common issue we find is a problem known as Grout Haze or Grout Smearing where a thin layer of grout has been left to set on the surface of the tile. Once grout has set it is difficult to remove.

Discolouration of grout joints in bath or shower areas due to continued use of acid formulated shampoos and soaps. This causes yellow orange and pink stains to the grout over even a short period of time. Whilst Grout Joints can be cleaned, badly stained grout may need to be re-coloured.

Protecting your grout in advance with a sealer will prevent most of these issues and although relatively unknown in the UK, protection awareness is growing. Sealing forms an invisible barrier between the grout and the surface, this will then protect your investment for years to come.

We have solutions for all the problems listed above and below you will find detailed examples of work we have carried out in the past to resolve many of these issues. It should give you some idea of what’s involved and what can be achieved with the right techniques and products.


Quarry Tiled Kitchen Floor Restoration Morriston Swansea

Quarry Tiled Floor Fully Rebuilt and Restored in Morriston Swansea

This customer from the Morriston suburb Swansea contacted us about their Quarry tiled floor which needed a deep clean and seal; also, they had a section of flooring which had been back filled with cement that they wanted digging out and retiled with matching tiles. I suspect an old heavy range cooker once occupied this space and the floor had been concreted to cope with the weight.

Quarry Tiled Floor Before Renovation Morriston Swansea

I’m an experienced tiler so was more than happy to remove the old concrete and replace with Quarry tiles however it can be an issue finding suitable tiles that were a close match to the rest of the floor. I worked out a quote for doing the work which was accepted and a date set of the work to start.

Repairing a Quarry Tiled Kitchen Floor

We began the first day by carefully digging out all of the cement that had been backfilled into the floor. The rubble was removed and the section levelled by pouring in a quick setting self-levelling latex compound.

Quarry Tiled Floor During Renovation Morriston Swansea

Whilst this was drying, I worked out a tiling plan using the quarry tiles I had managed to source that were a close match to the original. I knew that once the floor was cleaned and then sealed, they would blend in well. Once the latex was dry the floor was rebuilt using the new tiles and then grouted in. My customer was thrilled to see the transformation that was happening.

Deep Cleaning a Quarry Tile and Grout

The next day with the replacement tiles set work began on deep cleaning both sections of flooring using a strong dilution of Tile Doctor Pro-Clean which was allowed to soak into the tile and grout for a while so it could break down and loosen the dirt, existing sealer, and stains.

Whilst applying the Pro-Clean I noticed there were paint spots specifically next to the skirting boards so to ensure they would also get treated Tile Doctor Remove & Go was applied, again leaving for 15 minutes. The products were then agitated into the Quarry tiles using a stiff brush and water making sure to scrub along the grout lines to clean them up as well. This action lifted the soils out of the tile to the surface where they were extracted using a wet vacuum.

After this step a coarse 400-grit burnishing pad fitted to a rotary floor buffer was run over the tiles using water for lubrication. These pads are made from industrial diamonds and grind away at the clay tile to release more dirt and soiling. Once done the floor was rinsed with water and vacuumed again to remove as much moisture as possible.

Last step was to inspect the floor and spot treat any sections where the machine may have struggled to clean and needed further work. Once satisfied with the results the floor was left to dry off overnight so it would be ready for sealing the following day.

Sealing a Quarry Tiled Kitchen Floor

The following day we arrived and conducted a moisture test on the floor which concluded the floor was dry enough to be sealed. The customer wanted a matt finish sealer that also enhanced the colours of the tiles so Tile Doctor Colour Grow was selected.

Three coats of Colour Grow were applied allowing each coat to dry for thirty minutes before proceeding with the next. The floor was the dry buffed using a White pad to remove any residue off the surface of the Quarry tile. The customer was delighted with the outcome and so were we.
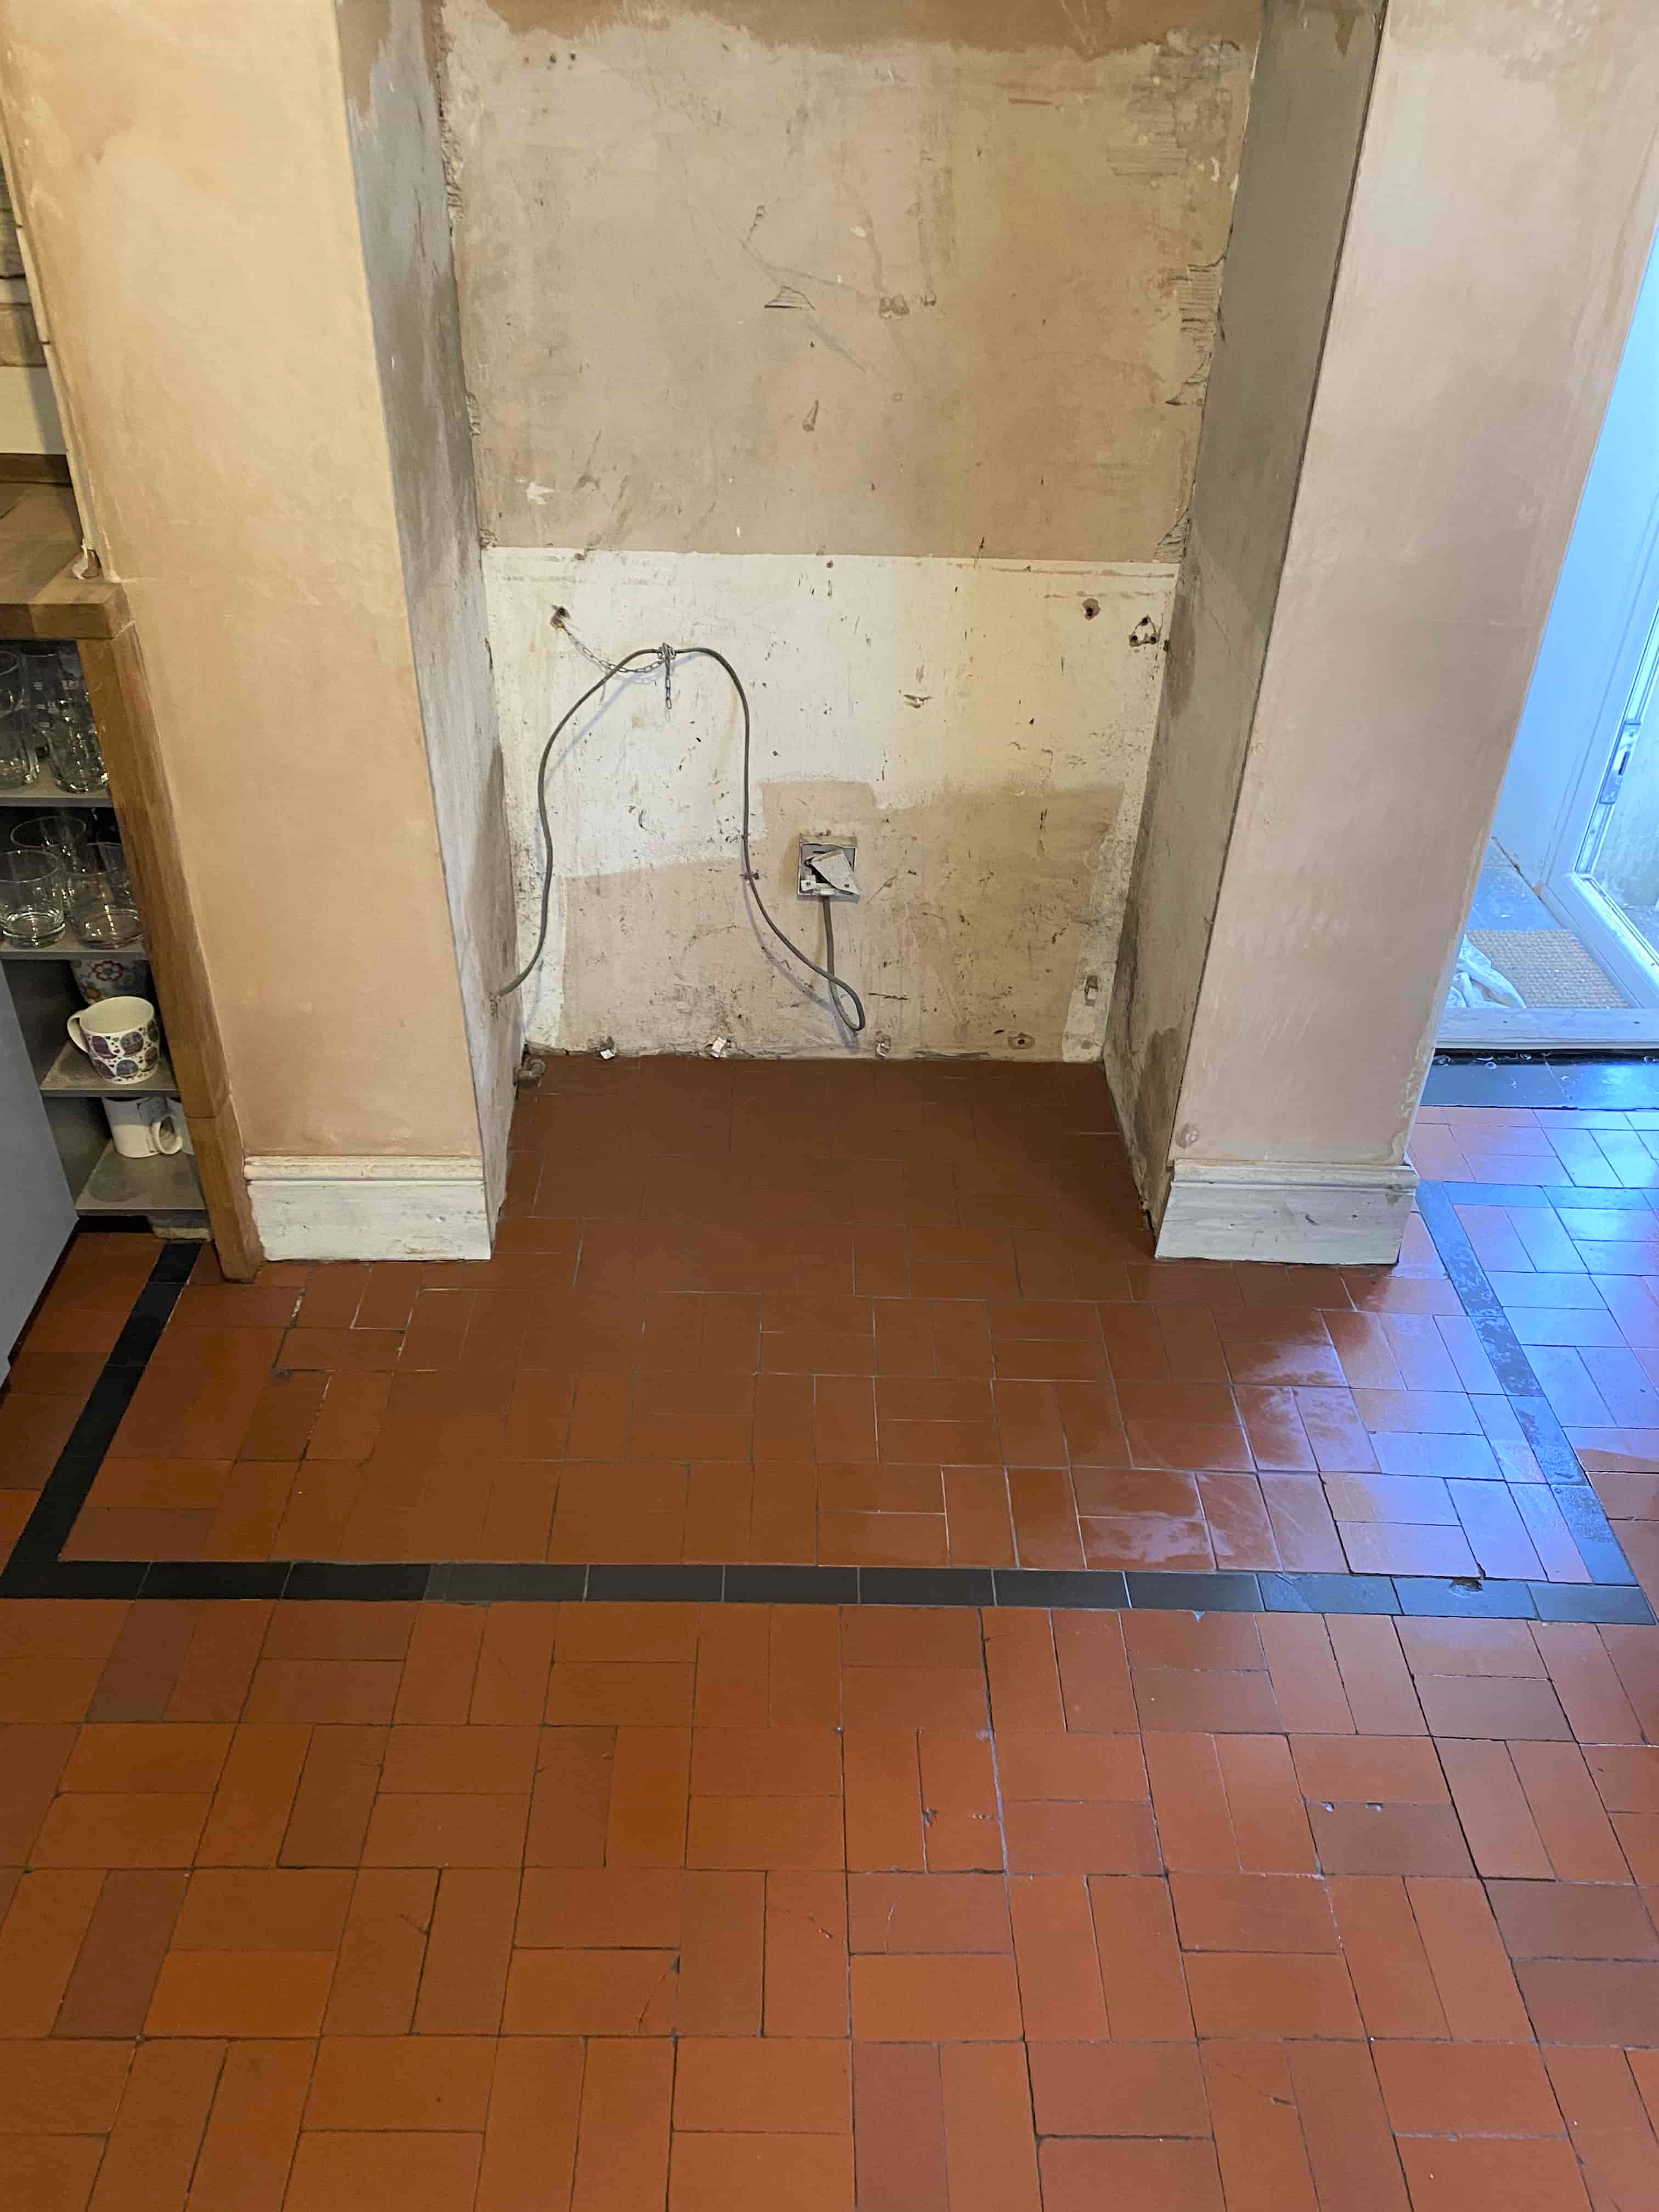
Quarry Tiled Floor After Renovation Morriston Swansea

The deep clean and new sealer really helped blend in the replacement tiles with the original and once complete my customer was very happy with the transformation. Before leaving we discussed aftercare and recommend Tile Doctor Neutral Tile Cleaner to maintain the tiles going forward. This is a pH neutral product that is safe to use on sealed surfaces and won’t prematurely erode the sealer like many stronger tile cleaners you will find in supermarkets.

Quarry Tiled Floor After Renovation Morriston Swansea


Professional Restoration of a Quarry Tiled Floor in Swansea

Quarry Tiled Floor Fully Rebuilt and Restored in Morriston Swansea Read More »

Victorian Tiled Hallway Floor Renovated in Swansea

Victorian Tiled Hallway Floor Renovated in Swansea

This is a great example of a classic Victorian Tiled Hallway and shows just how hard wearing and durable these floors are. The floor had been installed at a house in Swansea what must have been well over a hundred years ago and was now very badly soiled however I knew from experience that with the right techniques and products they can be given a new lease of life.

Victorian Tiled hallway floor before cleaning Swansea
We mainly use diamond burnishing pads on original Victorian tiles these days, the alternative is to use cleaning products however that method tends to use a lot of water and can aggravate an issue known as efflorescence whereby salts from the sub floor are carried up through the tile as moisture evaporates leaving white salt stains on the surface of the floor. This is not a problem with modern floors as they are usually have a damp proof membrane installed under the floor which prevents damp.

Deep Cleaning Victorian Hallway Tiles

To restore the appearance of the Victorian tiles I started with the application of a coarse 200-Grit diamond encrusted burnishing pad which cuts through the dirt and removes surface staining. The pad is run over the tiles using water to lubricate and then the floor rinsed afterwards to remove the soil that is generated. The soil is then extracted off the floor with a wet vacuum. This is then followed up with a 400-Grit pad which cleans and restores the surface which is left roughened after the application of the coarse 200-grit pad, again the pad is applied with water and then the flor rinsed afterwards to remove the soiling and the water is extracted using a wet vacuum.

The next step was to give the floor an acid wash using Tile Doctor Acid Gel, the acid neutralises the alkaline mineral salts in the floor and reduces the chance of efflorescence occurring, After being scrubbed into the floor the gel is rinsed off the floor using water which is then quickly extracted with the wet vacuum.

The floor was left to dry off overnight and I came back the next day to apply the sealer.

Sealing Victorian Floor Tiles

Before starting the sealing process it’s important to check the floor is dry first for which I use a hand-help damp tester. I find it’s a good idea to take readings from various parts of the floor before I start a job so I can establish a normal background level for the floor.

All was well so the floor was sealed using a couple of coats of Tile Doctor Colour Grow which is an impregnating sealer that works by occupying the pores in the clay tile thus preventing dirt from becoming ingrained there. This particular sealer also enhances the natural colours in the tile and is fully breathable which is important in these situations where you need moisture to evaporate through the tile and not become trapped underneath where it could work its way into the walls of the house.

Victorian Tiled hallway floor after cleaning Swansea
It’s worth knowing that if you do experience effluence salts which are more likely in the damp winter weather, then they can be mopped off the floor before they harden without any damage to the sealer itself.


Victorian Tiled Floor Rejuvenated in Glamorgan

Victorian Tiled Hallway Floor Renovated in Swansea Read More »

Dull Spanish Terracotta Tiled Floor Renovated in Swansea

Dull Spanish Terracotta Tiled Floor Renovated in Swansea

This lovely old Spanish Terracotta tiled floor was installed at a house in Swansea. Over the years the sealer had worn down and dirt had become ingrained in the pores of the clay tile making it impossible to clean effectively. The owner called me in to give the tiles a really deep clean and bring the floor back to its former glory.

I went round to take a look at the floor and carried out a cleaning test of the tiles with a medium strength dilution of Tile Doctor Pro-Clean scrubbed into the tiles by hand. This demonstrates to the customer how the floor could look, and it also helps me to work out which product will work best as well as the likely quantities required for the quote. The Terracotta tile and Grout in the test area came out well and after showing the customer the result and working out a price for the whole floor and he was happy to book me in.

Stripping and Re-Polishing Terracotta

On my return I continued with the cleaning process using more Tile Doctor Pro-Clean but this time I left it to soak into the floor for longer and was assisted by a Black Scrubbing pad attached to a rotary buffing machine. I like to use a slow speed buffing machine for this process as it makes less mess than a high speed and this keeps my customers happy.

Spanish Terracotta During Cleaning Swansea
It wasn’t long before the cleaning solution changed colour with the dirt that was becoming released from the floor. The dirt was then rinsed off the floor using water and a wet vacuum, and the process repeated until I was happy the tiles were clean.

The next step was to clean the grout lines, this task is best done by hand with a stiff brush and more Pro-Clean as the scrubbing pads struggle to reach into the recesses of the grout line. Once I had finished the cleaning I rinsed the floor down several times with water, to make sure all traces of Pro-Clean were removed.

The cleaning process took up most of the day and the Terracotta would need to be dry before being sealed so I before leaving it to dry off fully overnight I covered the floor with a clean linen dust sheet (not plastic) to protect it overnight. This allows evaporation to continue whilst protecting it from getting dirty again.

Spanish Terracotta After Cleaning Swansea

Sealing Terracotta Floor Tiles

The next day i came back and took some moisture readings to make sure the floor had dried out. Most of the readings were fine apart from a few edges and corners where the moisture must have settled; I used a heat gun on these areas to ensure these areas were dry before starting with sealing.

Terracotta is a very porous clay in its unsealed state, so I like to put down a coat of Impregnating sealer first called Tile Doctor Colour Grow. Colour Grow works by occupying the pores in the tile making a good base, it also has the added benefit of enhancing the natural colours in the clay tiles.

After leaving it to soak into the tiles for about ten minutes I removed the excess Colour Grow with a cloth and started to apply a Topical sealer Called Tile Doctor High Shine. The customer had requested a high sheen finish, so after several coats of this the job was completed and looking a million times better than before.

Spanish Terracotta After Sealing Swansea
I left the customer a complimentary bottle of Tile Doctor Concentrated Neutral cleaner for aftercare. We recommend using this product for the regular cleaning of sealed tiles, being pH neutral is doesn’t eat into the sealer prematurely reducing its longevity like your regular acidic cleaning products.

Spanish Terracotta Tiled Floor Rejuvenated in Glamorgan

Dull Spanish Terracotta Tiled Floor Renovated in Swansea Read More »

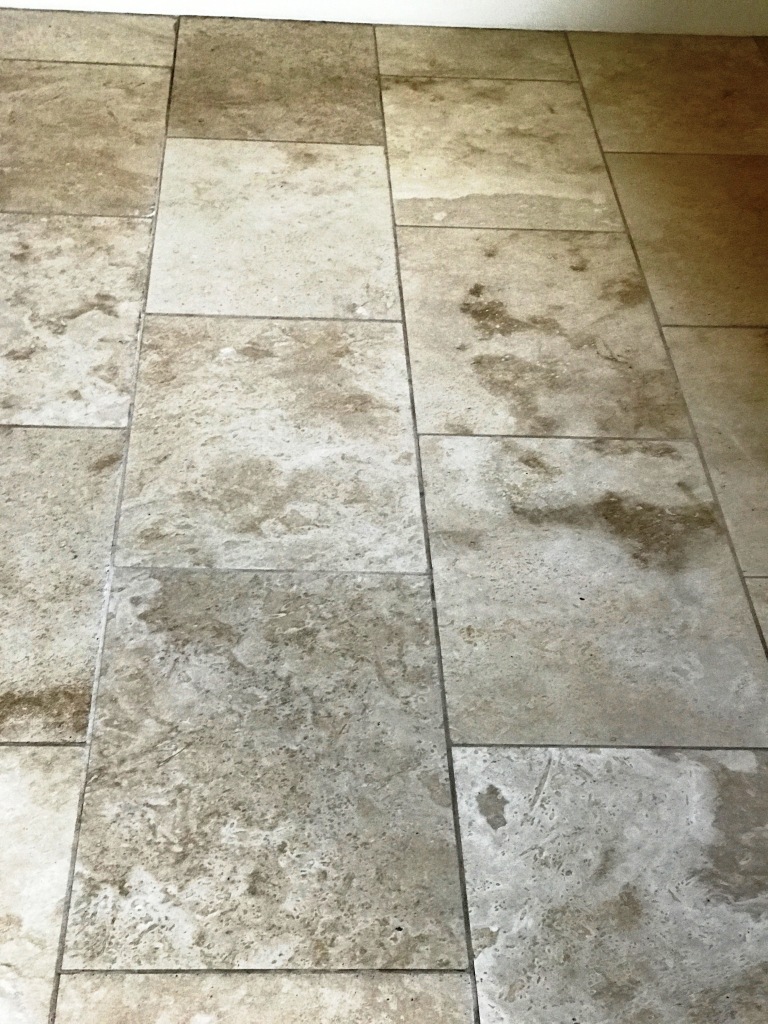
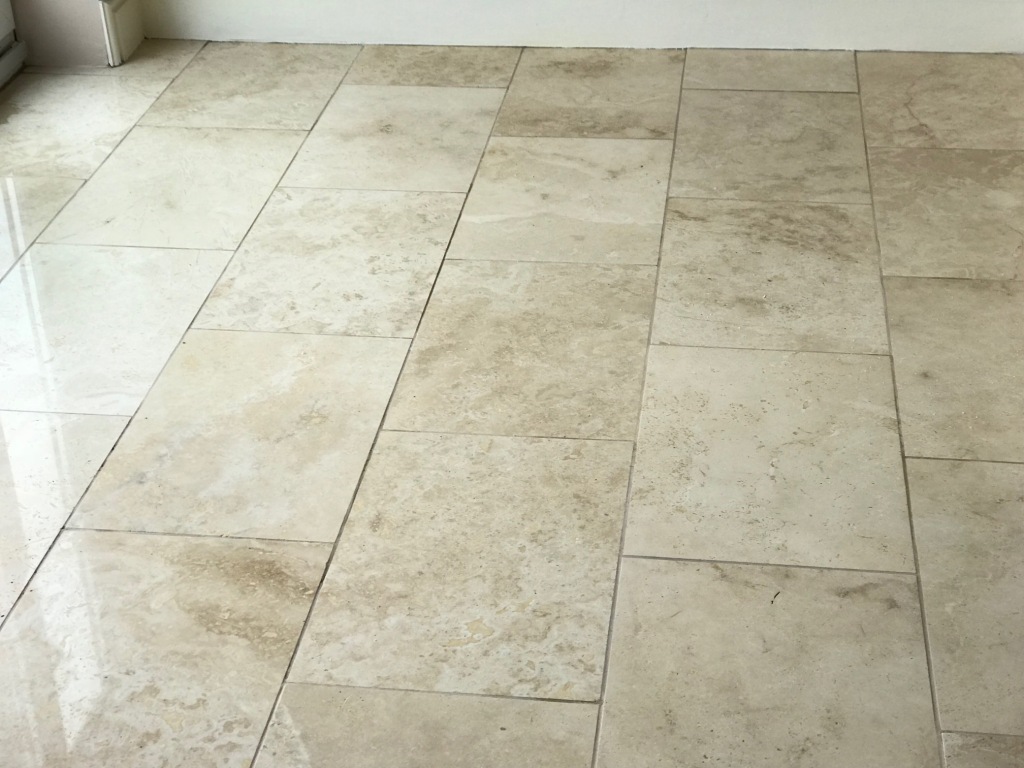
Travertine Tiled Floor Before and After Polishing Swansea

Stripping, Polishing and Sealing Travertine Tiles in Swansea

This customer from Swansea was unhappy with the look of her Travertine floor tiles and so decided to call in tile doctor after she had seen pictures of other travertine floor tiles on one of our websites and wanted hers to look the same. The natural brown shades of her own Travertine tiles had become very dark and were looking dull and lifeless in comparison.

It was clear to me that the Sealer was wearing thin with use and dirt had now penetrated the pores of the stone making it difficult to clean effectively. This is a common problem with stone floors and this is why Tile Doctor offer a maintenance service where we pop round once a year to top-up the sealer on your floor.

Travertine Floor Swansea Before Cleaning Travertine Floor Swansea Before Cleaning

Stripping and Re-Polishing Travertine

To restore the polished appearance of the floor the stone would need to be stripped of any remaining sealer and dirt, re-polished and then sealed; we find the best way to achieve that is through the application of a set of Diamond encrusted burnishing pads.

I started the burnishing process by fitting a coarse 400 grit no.1 burnishing pad to a floor buffer and running at a slow speed ran the pad across the whole floor. This coarse pad is designed to strip off old sealers and dirt from the tile. You use a little water to help lubricate and once complete it’s necessary to rinse the area with water to remove the soil that is generated. The next step is to start building back the polish with the 800 and then 1500 grit pads which are applied in the same manner.

The floor was then rinsed again with water and I turned my attention to the grout which was scrubbed by hand using Tile Doctor Pro-Clean and a stiff brush. The floor was given another rinse and then inspected to ensure I hadn’t missed anything. Before leaving for the day I used the wet vacuum to extract as much moisture from the floor as possible.

Sealing Travertine Floor Tiles

On the second day I finished the banishing process with the application of the final of the four pads which is a very fine 3000 grit pad which adds a final polish to the surface leaving it looking shiny. This last pad is applied with a small amount of water spayed onto the tile in a process we call a spray burnish. The use of water is so small the floor remains dry enabling us to apply a sealer shortly afterwards.

There are some beautiful brown shades in Travertine and so to really make them standout I sealed the floor using a couple of coats of Tile Doctor Colour Grow which is a colour enhancing impregnating sealer that soaks into the pores of the stone protecting it from within. The sealer will also make ongoing cleaning and maintenance easier for the customer.

Travertine Floor Swansea After Cleaning
The customer was very pleased with the result and commented on how clean and deep the shine had come out using the Diamond pad system.

Travertine Floor Swansea After Cleaning
Before leaving I recommended the use of Tile Doctor Stone Soap as an aftercare cleaner, this produce is specially designed for cleaning polished stone, not only does it helps build patina, but it won’t prematurely erode the sealer like many acidic cleaners you find in the supermarket which should really only be used on ceramics and Vinyl tiles.

Travertine Tiled Floor Polished in Glamorgan

Stripping, Polishing and Sealing Travertine Tiles in Swansea Read More »

=================================

Swansea Tile Doctor

================================= Read More »

Scroll to Top